2.27.2013

DIY Pillows

I have been looking for couch pillows for a really long time. I could never find just the right color or just the right size. I saw this tutorial from the blog, idigpinterest.blogspot. I had an "Ah-ha" moment. These are made just like my burp cloth tutorial. I kept trying to find cheap pillow forms to wrap fabric around. I am so glad I never bought any pillows, because I absolutely love the fabric I found. I also saved a ton of money. My husband told me I could make pillows til I was blue in the face. . . he may regret those words. I know I have found a new addiction. . now to find more fabric.

Step 1: Cut out size you want. Make sure if you want a square to make all sides the same size. Also remember that the size you cut out will not be the final size of the pillow. I grossly underestimated this step.
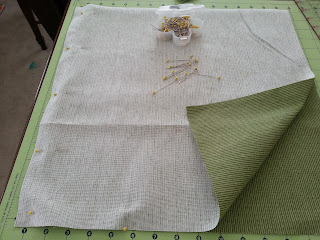
 Step 2: Pin together. Make sure the pretty sides are touching. :)
Step 3: Sew together. Make sure to make a 1/2 inch seam, and use a sturdy stitch(not just a basic stitch, your pillows may or may not be thrown around by a 7 and 4 year old. . .just sayin.) Also make sure to leave a slot to stuff your pillow.
 Step 4: Clip edges of corners. This will ensure a crisp corner when you are finished. Make sure you don't cut your stitch otherwise you will have a hole.
Step 5: Turn pillow right side out. I ironed them flat, and then stuffed them.
Step 6: Sew slot closed. I suppose you are supposed to hand sew it closed, but I am terrible at that so I just used my machine. You can hardly notice the finished edge.

This is the fabric I found for the smaller pillows for my couch. This is where I underestimated the final size of the pillow. They still turned out pretty cute, but I would have love to have had them a little bigger.
This is also something I found that made finishing the pillow easier. Making the opened slot in the middle of the side instead of on the corner. That way when you stuff the pillow you can get all of the corners.
Ta-Da. . .This is my finished product. My 4 year old was asleep when I did these and when she woke up she thought they were hers.

I love how they turned out, and I promise they will not be my last pillows!

*For the green pillows I bought 1 1/2 yd. For the black and white I bought 1/2 yd. I should have at least bought 1 yd.

2.22.2013

Crack popcorn

I made this a few months ago for book club. I got the recipe out of this book. It was fast, easy, and my house smelled heavenly. I knew it would be an instant hit, and it was. I omitted the pecans the first go around. I prefer them, but as I have found out, most people don't like them. I truly don't think you can tell the difference is you weren't told, but to each his own. I highly recommend this recipe. It is a good make-ahead treat. I have already been asked by a ton of people for the recipe. You will too when you make it.

Cinnamon Bun Caramel Corn
Recipe by Our Best Bites
12 C popped popcorn (about 1/2 C kernels)*
1 C roughly chopped pecans
1 C brown sugar
3/4 t cinnamon
1/4 C Karo syrup (or honey makes a good substitution)
1 stick real butter (1/2 C)
1/2 tsp. baking soda
1 tsp. vanilla
3 squares almond bark

*You can use air popped or microwave popcorn. If using microwave, anything works, but I prefer a “natural” flavor that’s low in butter and salt.

Preheat oven to 250 degrees

Place popcorn and chopped pecans in a large bowl and set aside. You will need a big bowl, not a brown paper bag to eventually mix with the caramel. The caramel mix maybe too wet and dissolve the bag. . I'm guessing. .. . ;)
This is my preferred way to 'pop' popcorn. No oils, no crazy ingredients. I have tried the brown lunch bag way, and it took way too long since you can only do a small amount at a time.
I place about 1/4 cup of popcorn in a glass bowl, cover with a plate, and microwave for about 3-4 minutes.

Combine brown sugar and cinnamon in a big, microwave-safe bowl. Like a 2-quart bowl or Pyrex measuring bowl. It smells so good already.
Chop butter into chunks and place on top of sugar mixture. Pour corn syrup (or honey) over the top of everything.
Microwave on high for 30 seconds (just to soften the butter a bit) and then stir to combine.
Return to microwave and heat for 2 minutes. Remove and stir and then microwave for 2 minutes more.
It should look like this.
Remove from microwave & add baking soda & vanilla. Stir to combine. The mixture will foam & rise.
Pour caramel mixture over the popcorn and pecans and stir well so everything is well coated. 

Spread popcorn mixture onto foil-lined jelly roll pan. Place in oven and bake for 30 minutes, stirring every 10 minutes. 
Remove the pan from the oven and spread mixture out on parchment paper.
 Melt the almond bark and drizzle over popcorn mixture.

1.24.2013

Nutella Cookies

Ingredients
1 1/3 cups all-purpose flour
1/2 teaspoon baking powder
1/2 teaspoon baking soda
1/4 teaspoon salt
1/2 cup butter, softened
1/2 cup Nutella
1/2 cup sugar
1/2 cup brown sugar
1 egg
1 teaspoon vanilla extract
3/4 cup chocolate chips
Instructions
1. Preheat the oven to 375 degrees F.
2. In a medium bowl combine the flour, baking powder, baking soda, and salt. Set aside.
3. In another medium bowl combine the butter, chocolate hazelnut spread, sugar, and brown sugar. Using a stand mixer, cream the ingredients together.  Add the egg and vanilla and beat until smooth. Using a rubber spatula, stir in the flour mixture until just combined. Add the chocolate chips and stir until just combined. Refrigerate dough for at least one hour.
4. Using a tablespoon measure, spoon out the cookie dough onto a cookie sheet, spacing the mounds about 4 inches apart. Use the tines of a fork to flatten the cookie dough. Bake until golden around the edges, about 10 to 13 minutes. Let cool briefly, then use a spatula to transfer the cookies to a wire rack and let cool.

I went looking for this recipe after my hubby and I had a Nutella chocolate chip skillet at Biaggi's. It was A.M.A.Z.I.N.G.  I was a little apprehensive of the amount of butter in the recipe, but curiosity got the best of me and I had to try it. Right off the bat the batter tasted so close to what we had at the restaurant. Next it was obvious that 10-13 minutes will turn your cookie into crisps. I personally have never been one for crispy cookies. I like them cooked, but gooey in the middle. The skillet cookie we had was this way. Once I tweaked the cooking time they came out more moist. However once they cooled off they lost their gooey-ness. So unless you can and want to eat them straight out of the oven with a small scoop of ice cream on them. . .you will want to keep looking for a Nutella cookie recipe.

1.23.2013

Christmas Card Edition 1

These are a few examples of Christmas cards I have made with my digital scrapbooking software.I can recreate almost any design you can find online, and it is so much more personal. I will also do a baby announcement post as well as a birthday invite post. . Stay tuned.

1.22.2013

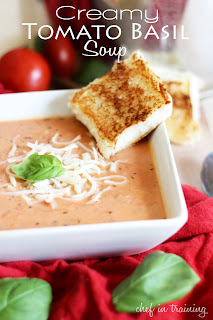
Tomato Basil Soup


  • 1/2 cup butter
  • 2 heaping Tbsp. minced garlic
  • 1/2 cup flour
  • 3 cups half and half
  • 2 1/2 Tbsp. chicken base*
  • 2 (28 oz.) cans diced tomatoes
  • 1 cup tomato puree
  • 1/3 cup sugar
  • 2 1/2 Tbsp. dried basil about 1/2 cup fresh basil leaves and chop
  • 1/2 tsp. pepper more if needed TT
  • 1/2 tsp. salt more if needed TT
  • milk if needed to thin to desired consistency

Instructions

  1. Melt butter in saucepan. Once melted add garlic and sauté for a minute or two. Stir in flour and make a roux.
  2. Once roux is formed, slowly pour in half and half, stirring as you pour. Stir consistently until it begins to thicken.
  3. Stir in chicken base, diced tomatoes, tomato puree, sugar, basil, pepper and salt. Stir until heated through. If needed add milk to soup to thin it out to desired consistency
 *Chicken Base is like a paste version of chicken broth/bullion. It is more concentrated that broth. Here is the kind/brand I use.  You can easily find either this or other brands at your grocery store.

I could not wait to try this recipe. I already have a tomato basil soup recipe, but felt like it was missing the mark a little. Sadly this recipe as is also misses that mark. I will explain. First off the recipe calls for diced tomatoes. I didn't want chunks of tomato in my soup so I threw the tomatoes in my food processor, and made them nice and smooth! They had a different flavor & texture than the tomato puree so I would still you both.
My next issue is the amount of garlic. 2 HEAPING tablespoons of minced garlic. I made this recipe basically as it was to see if I liked it. There were bits of garlic in every bite. Understandably this made my husband kindly ask me not to make this again. I am however determined to get this recipe the way I like it because the foundation is good. Next time I will omit the mince garlic, and add garlic powder instead.
The good things about this recipe are the texture(minus the garlic) and the taste. Nice and creamy without being too tomato-ey?! One thing that can be over done is the seasoning. Basil can very quickly become over bearing. The amount of basil in this recipe was perfect. I coupled this with another favorite recipe of mine. It is tried and true. Even if you don't make the soup. . try this recipe.
*I use Rhodes rolls instead of the frozen bread dough. I used about 10 of the texas-sized rolls. Mmmm.

1.21.2013

Honey Sesame Chicken

I love to try new recipes. Some turn out great, others my husband kindly asks me to never make again. It's fun. I've had my eye on this recipe for awhile and finally got around to making it.
 Slow Cooker Honey Sesame Chicken
Recipe adapted from: Baby Center

Ingredients:
4 boneless, skinless chicken breasts (thighs would be fine too)
Salt and pepper
1 cup honey
1/2 cup soy sauce
1/2 cup diced onion
1/4 cup ketchup
2 tablespoons vegetable oil (could also use olive oil or canola oil)
2 cloves garlic, minced
1/4 teaspoon red pepper flakes (optional - doesn't really add heat, just adds more flavor)
4 teaspoons cornstarch dissolved in 6 Tablespoons water
Sesame seeds

Directions:
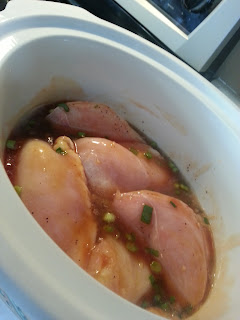
Season both sides of chicken with lightly with salt and pepper, put into crock pot. In a small bowl, combine honey, soy sauce, onion, ketchup, oil, garlic and pepper flakes. Pour over chicken. Cook on low for 3-4 hours or on high 1 1/2 – 2 1/2 hours, or just until chicken is cooked through. Remove chicken from crock pot, leave sauce. Dissolve 4 teaspoons of cornstarch in 6 tablespoons of water and pour into crock pot. Stir to combine with sauce. Replace lid and cook sauce on high for ten more minutes or until slightly thickened. Cut chicken into bite size pieces, then return to pot and toss with sauce before serving. Sprinkle with sesame seeds and serve over rice or noodles.

*You can also sprinkle more red pepper flakes on top if you want more heat.

I omitted the red pepper flakes because one of my kids think ketchup is spicy. I also accidentally forgot to add the soy sauce. It still turned out really good.  More sweet, and not as Asian as I was expecting.


Fried Rice
 recipe adapted from The Mattinglys

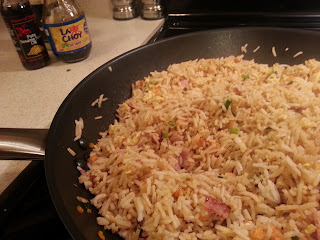
I have always wanted a good fried rice recipe, and an excuse to make it. I got both. I didn't have all the seasoning that The Mattinglys said they put in their fried rice, but it still turned out really good.
This recipe does not have any measurements. Just a little of this and a little of that. Totally changeable.

Ingredients
Basmati rice - made in advance, chilled in fridge
Veggies - we used:
Green onion
Carrots
Ham - cut up
Eggs
Oil - we used olive and sesame seed
Soy Sauce

Get the pan hot with some oil, add veggies and saute
Once ready move all the veggies and meat to the side of the pan. Add eggs and move them around chop into pieces. Add rice, toss. Add flavorings. We just added soy sauce a little bit more sesame seed oil.
You are done!
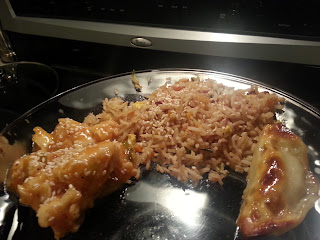
I finished off the sesame chicken with some sesame seeds, and added a pot sticker. It all went really well together.

1.20.2013

Scrapbook paper wall art

If you are anything like me you get bored with your wall decor ever now and then. I love scrapbook paper. Ever since switching to digital scrapbook I have no use for real scrapbook paper. Which is unfortunate because there are some really cute papers. This is a great solution for that problem. And you will all love it because it is super cheap to make. I found the frames at the dollar store, and added some cute paper. Done. That easy. It can be switched out all the time, and matches the colors in whatever room you put them in. 
This is in the hallway leading to my room. You can't really tell from the picture but the tree paper is a sage green, and the paper on the other end is dark brown. I cut the vinyl and put it right on the wall, and then just put a frame over it. Very simple, elegant, and customizable.
These last two pictures are in my half bathroom. The whole bathroom is black and sage green. I could never find the right decor for it, so I made it myself.

1.19.2013

Piñata

When my oldest started having friend birthday parties I bought him a piñata. Those things are crazy expensive cardboard. After that I decided to try to make my own. YouTube offered a few tutorials, and tips. Here is my experience.
Step 1. Cover area with paper, or just wing it like I did. I wasn't too worried about getting it on my craft table.
Step 2. Blow up balloon as big as you want.
Step 3. Mix water(1 cup) and flour(2 cups)
Step 4. Cut strips of newspaper, or in our case thrifty nickel ads. :) The size is not important. You can cut perfect strips, but it won't matter.
Step 5. Let each later dry. Not completely, but a little.
Step 6. Cover the balloon at least 3-4 times with paper.
Step 7. Once done covering balloon with paper, let it dry overnight.
Step 8. Pop balloon and carefully pull away from the sides. You should just come right out.
Step 9. Decorate your piñata. I used streamers and a glue stick.
Step 10. I lined the piñata with the streamer, and then cut uneven strips to make it fray.
Step 11. Bask in your awesomeness! I printed off the Hot Wheels label, and tied a bunch of streamers together and hot glued them to the bottom. It was a big hit.

1.18.2013

Time off

Wow, I really took some time off. I hope all your holidays were amazing, and hopefully you all escaped the plague that seemed to hit our house and everyone else we could see. I am working on a few posts. A few crafts, and a few recipes. I am really excited about them so make sure to keep checking back. To those that continued to visit the site while I was away. Thank you!

11.30.2012

Burp cloths

This is one of the crafts that I have been super excited to show you.When I first starting having kids I was given the jellybean shaped burp cloths. I love them. So much cuter than the plain white cloth diapers. When I had my little girl I found some really cute fabric and sent it to my sister to sew them for me, because lets be honest. . . I can barely sew a straight line. :) That being said, when I had my second little boy I wanted to try to make a more masculine looking burp cloth. I figured a rectangle was as simple as it was going to get.
Now depending on how many burp cloths you want to make is how much fabric you will end up needing. A 1/2 yard of each color(side) will give you 4 burp cloths. Depending on the size you choose to cut out.
Step one: Cut out fabric in a rectangle.
Step two: Take one of the sides from one color, and one of the sides from the other color line them up and pin them together with the fronts of the fabric touching.
Step three: Sew around the edge leaving a gap to be able to turn the burp cloth right side out.
Step four: Clip edges, this will give you a perfect corner when you turn the burp cloth right side out.
Step five: Turn right side out.
Step six: Iron. Make sure to fold in the gap that you left open.
Step seven: Find a decorative stitch, or not if that is not your cup of tea. Stitch around the edge making sure you get the gap tacked down.
Step eight: Bask in your awesomeness!
I love these burp cloths. I have made so many of these. They are great baby shower gifts, and so so easy to throw together.
The burp cloths below I made for the Festival of Trees. If you notice, the inside is not the same flannel material. . .it is terry cloth instead. That wonderful idea came from my little sister who made me some burp cloths like this. It is all preference. I feel like both types soak up dribbles, and fountains alike. The burp cloths with the terry cloth did turn out a bit thicker, so like I said it is all preference. I love the purple and white mix. So pretty.